Let’s face it. Making dice is expensive. I spent a lot of money my first year of making dice and that was taking into account that I’d been making resin crafts for years and had a bunch of stuff on hand already. Dice-making takes a lot of material and requires expensive tools, there’s no way around that. But we all want to budget, right? Read on for some tips on how to save money while making dice.
(Please note that many of these items contain affiliate links, which means any purchases you make will give a small percentage back to the site at no additional cost to you. All items were purchased by me with no compensation; these are just the products I use that work for me. For more information please see my Privacy Policy.)
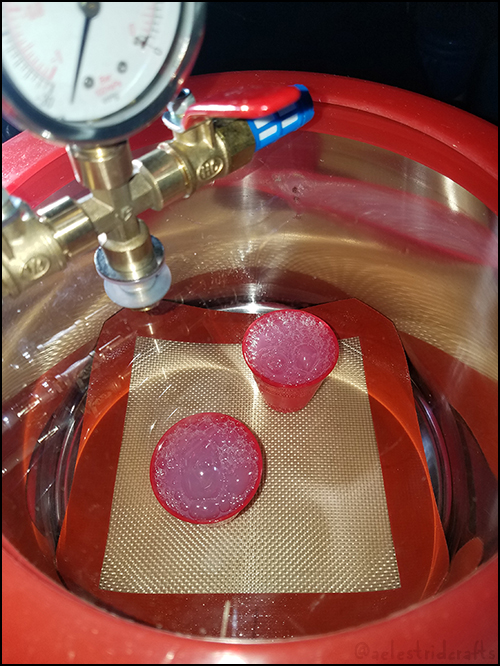
Pressure pot:
While I own a vacuum chamber for silicone and a pressure pot for resin, here are some tricks to save yourself a vacuum chamber. When making your silicone molds, you can put the cups into the fridge to slow down the curing and give it time to work the bubbles out. You can also put your silicone molds into the pressure pot to pressurize the bubbles like you would resin. (If you are not using a vacuum chamber and are going to use a pressure pot for dice, you have to pressure cast your silicone molds too or else micro-bubbles will show on your casts.)
When searching for a pressure pot, most people just go for the Harbor Freight one because it’s the cheapest. If you’re going to do this, make sure you search “Harbor Freight 20% coupon” and get the code to apply to your order. Why spend more than you have to? (Also, while we’re at it, these pots are famous for having leak issues. Invest in vaseline for the gasket ring on the lid and go ahead and buy a new safety valve because the one it comes with isn’t great.)
Want to save even more money on the air compressor? Use a bike pump! I use this connector which fits bike pumps and allows you to pump the pressure yourself. Plus, it’s way quieter.
Masters
I don’t want to discourage you from the big name master dice printers out there. If you go with one of these businesses, you’ll get a guaranteed product made by people who specialize in dice, know what to watch out for in your .stl designs, and will help you every step of the process. You won’t get that with other printers, and you definitely won’t get that with Shapeways. The price absolutely comes with value.
That being said, if you really need to save money and are willing to take a chance, I had excellent luck with Treatstock.com. It is a marketplace listing 3D printing businesses in the US and lets you choose the material, the price you are willing to pay, and the business you’d like to print your masters with. Click “Order 3D print” and then upload your .stls. I chose resin from the material options. Next, take a look at the businesses and prices being offered. I like to read the business reviews and see what printer they are using. Ideally it’ll be someone who uses the same type of printer people are using to print master dice (such as Formlabs Form 2 or 3), because you want a printer that can print resin material at the highest resolution available. I ended up spending 16 USD for two sets (the second was complimentary) and the quality was fantastic. It was hands down the best money I’ve saved.
Because of the fact that the marketplace of listed businesses and prices change, you can’t be certain you’ll get exactly what you need in the first print. But because the prices are so reasonable, you’ll be able to order a reprint with another business if your first set doesn’t turn out. If you do not live in the US, you may have to check the available shipping options for each business.
Inclusions and colors:
I wouldn’t shy away from splurging on the fancy stuff, like Solar Color Dust pigments and glow in the dark powders, but for the basics? Ali Express or Wish. It can take awhile to get your order in, but I’ve saved so much money on colorants, foil leaf, and other little inclusions that I wanted to try out without spending a bunch. They also have a ton of nail art glitter and pigment which are great for making dice.
(Some people have ethics concerns with these sites, as they may have exploitative labor or products and at times resell things of dubious heritage like the infamous Wish molds, so purchase at your own discretion. I’ve found certain products are easier and cheaper to acquire this way while others are best bought from other sources.)
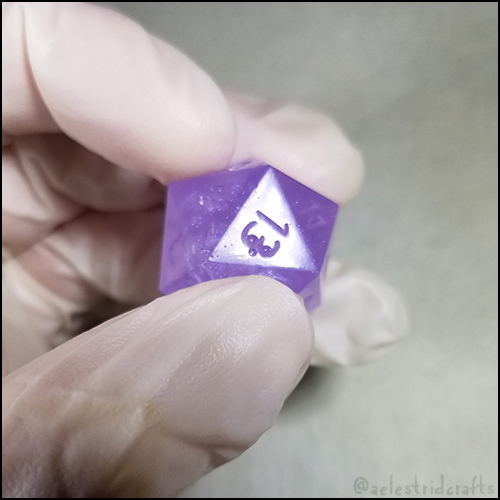
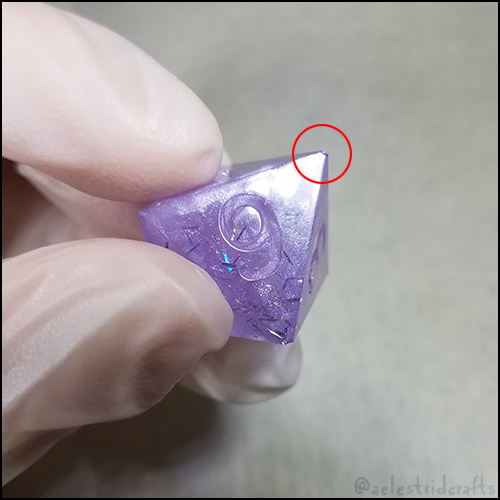
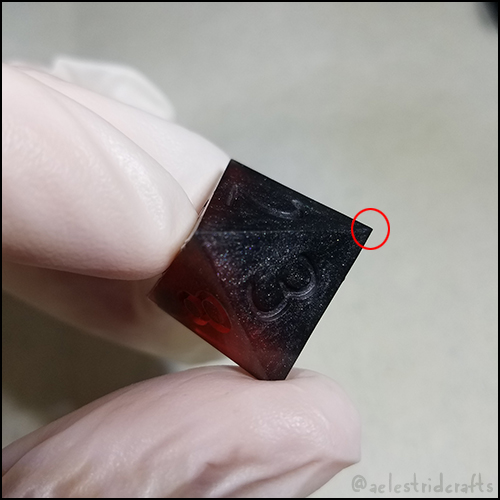
The Wish Molds:

![]()
You probably know about these by now. They are cheap and probably the point of entry for new dice-makers. (They are called Wish/Ali Express molds because they were first sold there, and still are for way cheaper, though you can get them on Amazon and such too.)
The pros are that they are easily attainable for anyone who wants to try out the hobby without making a huge investment, as making your own molds or buying premade sprue or cap molds can be expensive. They are also fairly easy to use, up to a point. Because they are cap molds, they are great for practicing inclusion dice styles or techniques like the petri method.
The cons are that you will often have pain in the ass voids which, while there are tips and tricks to reduce them, you will probably be patching even with a pressure pot. That, and the ethical dilemma that some of these molds appear to be copies of Dispel Dice’s style.
I encourage you to read Dispel Dice’s statement on the matter before you decide. The general consensus seems to be that it’s alright to use these molds for practice (and they are great for that) but selling what you make from them is frowned upon. You’ll want to get better molds immediately if you are serious about dice-making anyway, so this won’t be a problem.
Overall, I have to include them on this list because they are probably the only option most people have for even trying out the hobby until we get better cheap molds on the market.
Dollar Store
If you need items like toothpicks, cups, and other disposable supplies, look no further than the cheapest store available. Why spend five dollars on some item when you can spend one? Buy everything you can here, and you’ll save a lot. Keep an eye out at thrift stores, garage sales, and craft sales for glitter and other inclusions, too.
Supportive communities
If you want to get into dice making but don’t know where to start and also want to avoid costly mistakes, check out Dice Making Discoveries on Facebook! This is a lovely and supportive group that helps people create and learn how to make dice. It’s geared towards hobbyists and beginners learning the craft and has helped me avoid so many mistakes, as well as troubleshoot the ones I did make. Also, check out tutorials on Youtube like Rybonator and Dice Witchery for visual step by step explanations on how to make dice, molds, and more. There’s a ton of help out there, so take advantage of it!
I hope that helps you feel like you can get started, daunting as the final price tag may seem. Dice-making is a rewarding and fun hobby, and should be reachable regardless of your budget. Yes, there will be some financial costs up front (resin and silicone are expensive, no way around that), but with these tips you’ll be able to keep your budget manageable. Good luck out there!