• Skip to primary navigation
  • Skip to main content
  • Skip to primary sidebar

Aelestrid Crafts

  • About
  • Tutorials
  • Dice Making
  • Shop
  • FAQ
  • About your purchase

Aelestrid Crafts

How To Make Orgone Part 2

May 2, 2020 by Aelestrid Crafts Leave a Comment

Now we’re going to get to some actual pouring! Here comes the fun (and nerve-wracking and messy) part!

Step one: pouring in the hardener

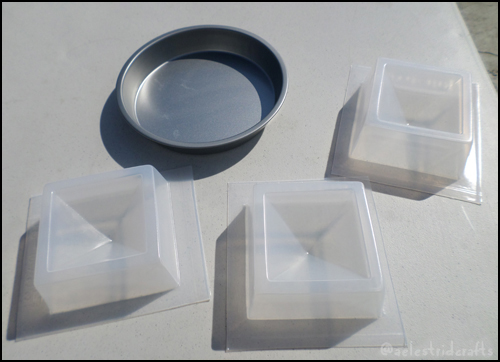
What I’ve done beforehand is measured out exactly how much liquid each mold will hold. I do this by filling the mold with rice and then pouring the rice into a measuring cup. (Make sure your molds are debris and dust free when starting.) That way I had an idea of how much resin to mix for each piece or each layer.

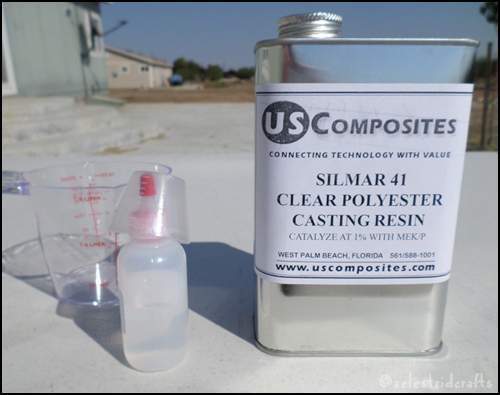
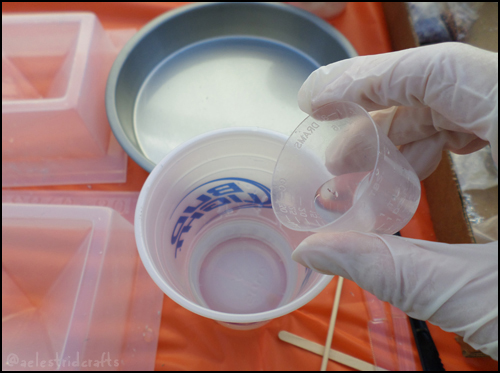
I figured that each pyramid would hold about a half cup (4 oz) of resin with all the metal and crystals added. I measured precisely this amount with my measuring cup and then started mixing. If you are adding fine metals, dye, or glitter, this is the stage where you would mix it into the resin. The last thing you want to do is put in the hardener because once you do that the clock starts ticking.

I’ve measured out 40 drops (yes, I counted every single one) in the included hardener cup and I’m pouring it into the cup to be mixed.

Step two: mixing the resin with the hardener

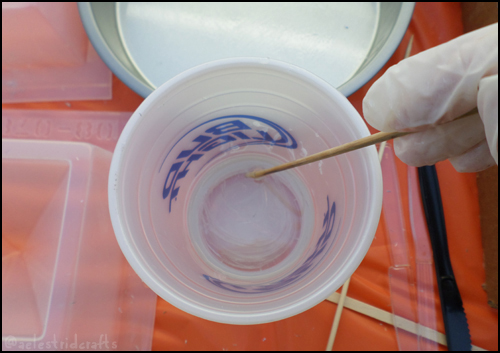
Here you’ve got your stir stick (skewers work well). Mix everything thoroughly to make sure the hardener and resin have been completely combined. Once you get to this stage, you need to act quickly. The estimate is 15-20 minutes of working time depending of course on how much hardener you added and how hot the ambient temperature is. I found I had about a minute or two before the stuff started to gel.

Part three: pouring in the resin

Before you pour, you’re going to spray your mold with your cooking spray or lubricant to be sure the finished piece comes out. Wipe it around with a rag to ensure all places get an even coating. This is especially important for glass or metal molds.

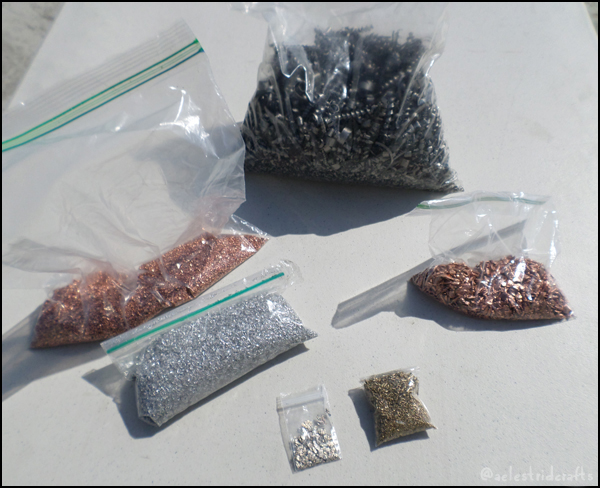
Adding the ingredients

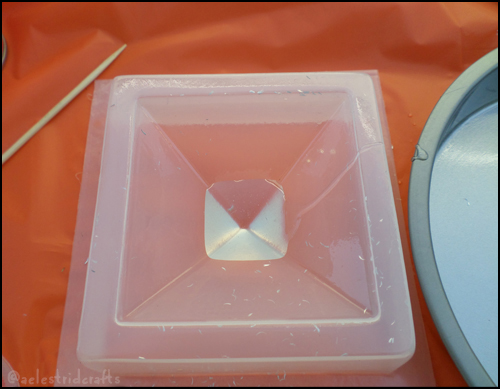
What I did here is pour a tiny bit of my half cup portion into the tip. I did this because I knew my metal shavings would be quite fine and I wanted the resin to soak through them without having air pockets or voids. I’d recommend starting with a small resin pour before adding any ingredients to avoid metal or crystals sticking out of the piece when you are done. Better yet, if you are working with very tiny metal shavings or splinters (as I was) it may be a good idea to mix that into the resin before you pour.

What some people like to do is let the layer start to gel so that they can place things on top without those items sinking to the bottom or to separate the color layers from each other if the piece is going to have dyed layers. It depends on what you are making. For an HHG like this, I’m working with one batch of resin and have no need to wait. I’m ready to pour in the first portion of metal shavings.

Step four: inserting the quartz point

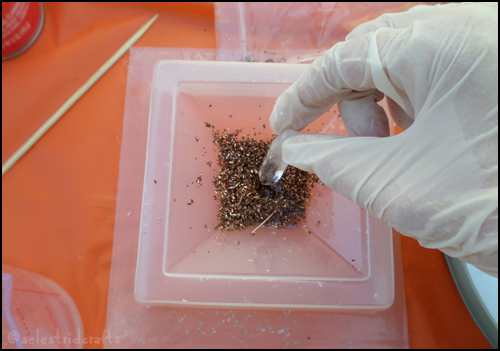
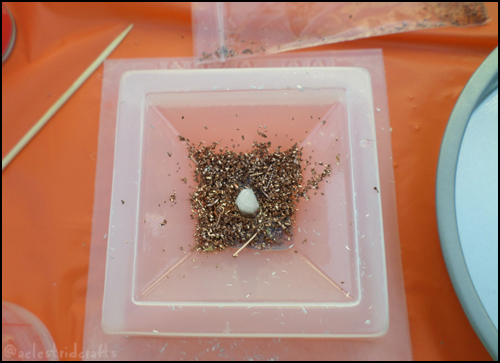
Here is where your quartz point will go in. If you are making a flat piece like a TB or a coaster shape you can lay the crystal on its side or have several points pointing in towards the middle of the piece. But what I’ve done is pour the metal shavings into the top to serve as a holding spot for my crystal. See how the resin has soaked into the shavings. Poke the metal with a skewer so the resin gets through all the little pieces.

Step five

Now you are ready to pour in some more resin, do a little poking with your stick, and start layering! At this point you will be doing metal shavings, resin, crystals, resin, metal shavings, crystals, resin, or however you want to layer your piece. Make sure you are adding resin in between layers to give it a chance to soak through all your ingredients. For a piece like this, it is unwise to put all your ingredients in at once and then pour the resin into the mold. Likewise, don’t put all the resin in and then add the ingredients. The resin will take up too much room with other stuff added in and will spill out the sides.

Step six: adding more

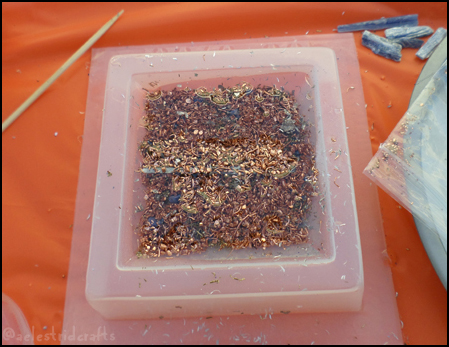
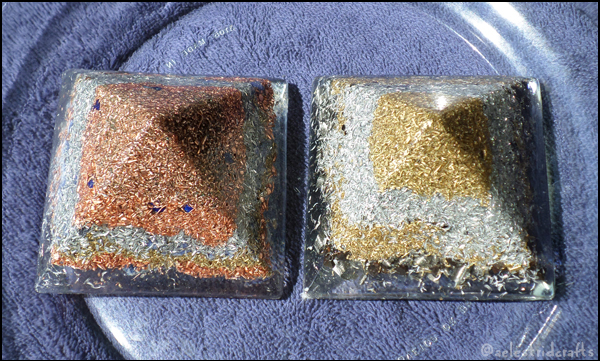
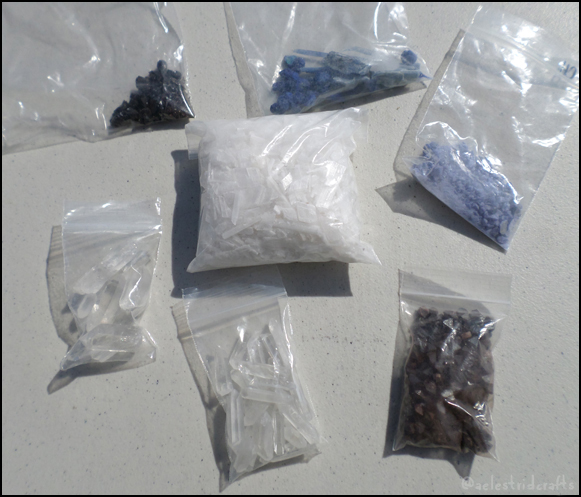
You can see that I’m getting near the end here. For this piece, I’ve added azurite nodules near the top, a layer of copper shavings, some crushed sodalite pieces, a bit of aluminum shavings, more copper shavings, some silver flakes, and then…

Step seven: finishing up

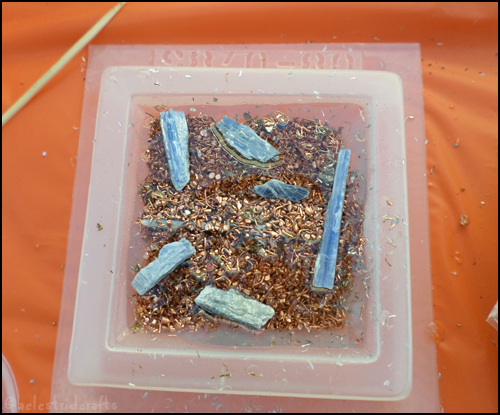
Blue kyanite blades. These will be visible at the bottom of the piece when it is done. You may not see the added crystals depending on how much metal you put in. I went metal heavy. I’ve heard some suggest a ratio of 50 percent metal to 50 percent resin (more or less) but let your intuition guide you.

Notice how uneven the sides of this piece are, and how the resin has not reached the top. Also notice how some of the metal and crystals are sticking out. This is not what we want, so right before we’ve reached the edge, we want to stop and do a little poking. You want the resin to encase all your ingredients and the edges to be smooth and even. After I poke everything down and make sure there are as few bubbles as possible, I add the last layer of resin over the top.

Waiting for the curing process

Step eight: letting the pieces cure

Now we wait for everyone to dry. This can take anywhere from hours to days depending on, again, the ambient temperature, humidity, how much hardener you used, etc.

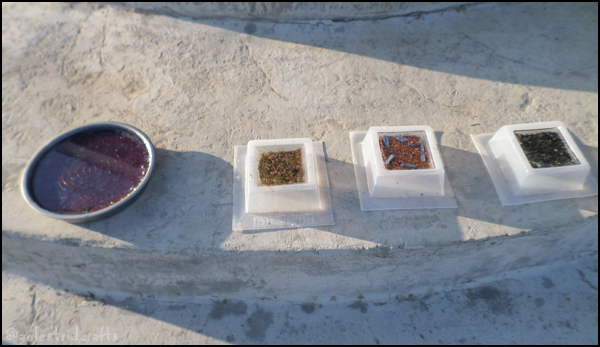
While we’re waiting, I’m going to take a minute to talk about my charging/cleansing plate you see up there. It was a rather complex piece and not one I would suggest for a beginner. I did it anyway, even though I was a complete beginner, and I got incredibly lucky.

Here was my concept. I get a lot of crystals and wanted a surface large enough to charge and cleanse them on. I was making mini pizzas one day when the idea hit me that a cakepan would be a perfect mold.

Charging Plate progress shot

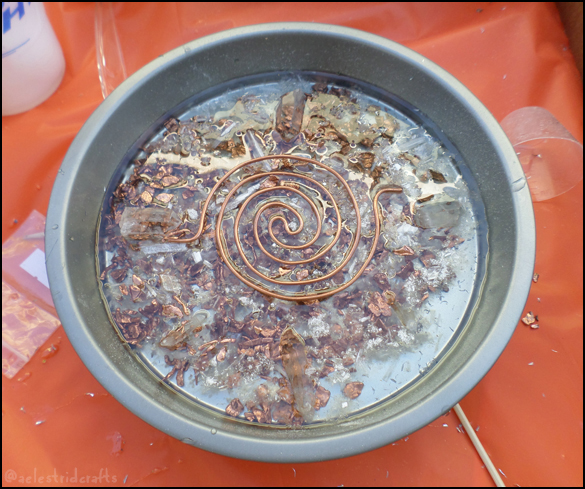
I started out with a cup of resin (80 drops of hardener, and yes, I counted those too). I layered the bottom of the pan with the resin and threw in some copper nuggets. I wasn’t concerned about letting the top layer gel a little bit to create a backdrop effect when I later added the visual ingredients, so that meant my copper nuggets were going to sink right to the bottom of the mold (or to the top of the finished piece). I then coated the whole thing with a sprinkling of selenite shards and dust. Selenite is a very cleansing and gentle crown chakra stone. It resonates at a high frequency, like the angelic realm, and was my primary crystal additive for this piece. Next, I added my grid of 4 large quartz points in each of the directions pointing towards the SBB coil in the middle (I made the coil out of #12 gauge copper wire from a hardware store). After that, I added in four quartz pencils in each of the available corners. You can barely see the crystals laid in because they blend with the selenite and resin, but they’re there.

My next layer was a heavy and liberal dose of sea salt sprinkled thickly throughout the pan. Salt is also very cleansing, and when I went to the store to buy some I picked out the canister whose cleansing effect could be felt most easily. I should add at this point that every single thing I put in I gathered slowly over months and put together to be sure they all matched each other energetically. This is very important. I didn’t want anything but high, cleansing energy so all crystals were chosen with this intent and laid out together beforehand to be sure they’d work for this purpose.

Also, remember that anything you add that is meant to be seen (pendants, SBB coils, pictures) needs to be put in upside down when you are making the piece because when you turn the finished product right side up after you’ve taken it out of the mold, you want the right side to be facing you. I sensed the direction of the SBB coil that I felt was most conducive and then put it in upside down so that when I turned it right side up it would be coiling in my intended direction.

Charing Plate progress shot

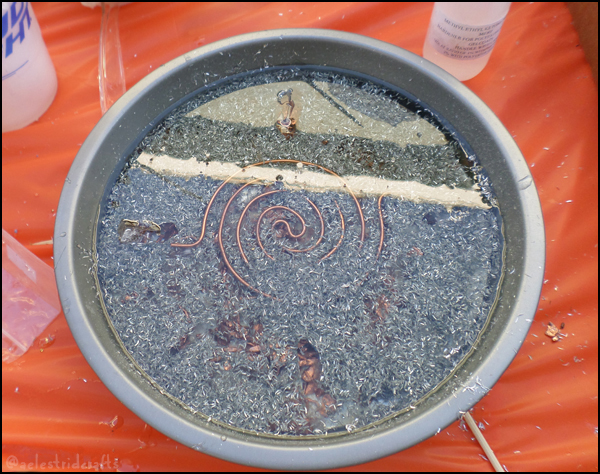
Next comes the metal. After I added the metal layer I put in a very intense, high quartz double terminated crystal in the center. At this point, I was layering about a cup of resin at a time. When I got closer to the top, I layered in half cup increments.

I had forgotten that I had bought a bottle of lavender iridescent glitter to add to the piece. I didn’t want to dye it per se, I just wanted it to have a little shimmer or sparkle or something. What ended up happening is that, in the second half of the piece, I suddenly remembered the glitter and mixed a whole lot into the resin I was preparing. What I got was a wonderful two-tone effect, with the glitter acting more like dye (whether because of the chemical reaction to the glitter substance or sheer quantity added, I don’t know) and setting the bottom half of the piece apart from the top visually. It was a happy accident.

So let’s get back to our pieces and see if they are drying nicely, shall we?

Step nine: starting to harden

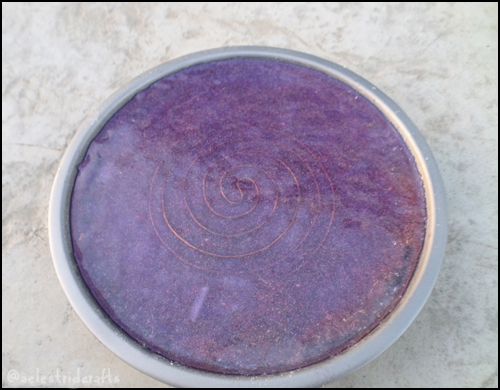
See how the piece is starting to pull away from the edges? This is a good sign. Hopefully you remembered to spray lubricant on your mold. Worse case scenario, you may end up destroying the mold to get the piece out or never getting the piece out, so be wary of that. My piece above looks like it’s starting to separate nicely from the mold. It’s shrinking as it is hardening so this is what you should expect to see.

Try not to touch the surface with your fingers, as you may get fingerprints permanently embedded in your pieces if they are still tacky. Feel the pan or near it; if it is still very hot leave it alone. When it starts to cool you might have a finished piece ready to come out!

Sometimes it doesn’t quite cure. If this happens, leave it for awhile and give it some more time. Don’t be afraid to give it a night or even a couple days. If it still isn’t curing, try baking it for a little while. Be sure to use the right amount of hardener. It’s not an exact science unfortunately and resin is temperamental. If, despite all your efforts, you can’t get it to harden, save it and add it to another piece you pour later.

We’ll see what the final results look like in part 3!

Filed Under: Orgonite, Tutorials Tagged With: HHGs, how to make orgone, how to make orgonite, orgone, orgone devices, orgone tutorial, orgonite, resin, resin crafting, tutorial

How To Make Orgone Part 1

May 2, 2020 by Aelestrid Crafts 1 Comment

Want to know how to make orgone on your own, but are unsure of what it involves? Don’t worry, I’ll walk you through the process!

(This post contains affiliate links, which means that if you choose to make any purchases through one of the provided links, aelestridcrafts.com may get a small portion of this sale. This does not cost you anything extra and helps to support site costs.)

Years ago I stumbled onto the concept of orgone (also known as orgonite) and found myself sinking hours into videos and how-to guides. My first thought was that the process seemed unwieldy in terms of price, materials, time, and knowledge requirements. Make orgone myself? Was that something I could try? When I found a group of pagan crafters like myself, I suggested a party where we could make orgone together. Everybody could pitch in for materials and share experiences, supplies, and support. So that is exactly what we did.

I won’t get into the particulars of what orgone is or what it is said to do here. The resin and metal shavings work together to amplify the energy of whatever else you put in. I thought that my pieces would resonate at whatever frequency I had made them for. The actuality exceeded all my expectations.

What I want to offer is a step by step guide of what to expect while creating orgone devices.

So this is what we’ll be making:

finished orgone pyramids

These pieces are referred to as Holy HandGrenades or HHGs. They are generally more decorative and personal than TowerBusters (TBs), which tend to be thrown into bushes or around towns to give their energy to the environment. HHGs can be made with particular intentions relevant to the person who will be using them. The above are two pieces out of a chakra set. Each piece has crystals that resonate and connect with the appropriate chakra.

So let’s get started!

What you need to make orgone devices:

Resin with hardener

Resin with hardener. The above is clear casting resin that can be bought in the quart size (pictured) or larger. It is pretty pricey and it’s what you’ll be spending the most money on unless you choose to add something really special. You can get cheaper brown-tinted resin at any hardware store, but if you want your pieces to be visually appealing, clear casting resin is the way to go. Muffinpan Tower Busters that get thrown into bushes are fine to make with the cheaper resin, but a lot of people prefer to use nicer resin for HHGs.

As you can see, I bought Silmar 41 online at US Composites. It came highly recommended and also included a guide as to how much hardener to add, since this is not a 50/50 ratio resin. It’s the only resin I’ve used for this and I had good results with it.

It’s worth noting that having protection while using this resin is essential. Gloves, eye protection, and respirator masks are a good idea. This needs to be used outside or with adequate ventilation. Always check the safety sheet for the resin you are using and follow the instructions. This is not a substance you will want to breathe in or have contact with your skin, so be safe!

I use silicone mixing cups that I got from Amazon to measure my amounts of resin in precise increments. This is key to success for more complicated pieces and reduces waste. When I started years ago I bought cheap dollar store mixing cups but I hated throwing them away after each use, so I am happy to have silicone mixing cups that are reusable!

metal shavings

Here are your metal shavings. Any will do. Pictured above are copper granules, stainless steel, copper nuggets, aluminum, brass, and silver.

Some are cheaper than others, but what you go with should be a matter of preference. You can get these by asking around at metal shops and factories. I ordered all of mine online. Some of your metal shavings will come oily from the factory and the oil might cause an issue with the resin, so these will need to be washed in hot soapy water. I’m not going to say it was easy to wash and dry a ton of tiny metal coils, but I managed. I hear having a dehydrator helps. For me, it was lots of paper towels and air drying. Try to buy from sellers that list them as “oil free and clean” to save yourself the hassle, if you can.

I like to have a variety on hand because some pieces are more visually enhanced by silver metals, brass colored metals, darker metals, copper, etc. But to start with, you only need one type of metal, so pick what you prefer. They all work great.

How much metal do you need? It depends on your mold. For my 5 oz pyramid molds, I used maybe a teaspoon or two of each kind of metal I included. I had tons left over.

crystals

And here are your crystals.

Generally, to make orgonite all you will need is a quartz point, metal shavings, and resin. Don’t worry about having to add anything else; you don’t need to. However, if you want to, here are a couple things to keep in mind.

Gem shows and rock and mineral stores (NOT metaphysical stores) are good places to get chipped or rough crystals, crystals in bulk, or crystal sands/shards/dust which is perfect for orgonite. Check around and watch for good prices. Metaphysical places will try to charge a premium for these stones so buy from them only if something calls to you. Also, the crystals they sell will tend to be pretty and you won’t want to crack them up to put in orgone pieces where you might not even get to see them. Look for places that have boxes containing rocks from all over the world. They’ll have small pieces and a huge variety to choose from. I hit all the gem shows I can. You can order online if you’d like, but it’s always preferable to see and feel the crystals first.

Since orgonite is primarily an energetic endeavor, it helps if you are able to sense the energy from crystals. If you can’t, ask someone who can to help you or stick with just the quartz point. Some crystals don’t want to go in orgonite. Some won’t match the other crystals you plan on putting in. If, for instance, you get one of those mixed gem bags and just throw a handful in, you may find that the energy of your piece is trying to pull in too many different directions at once, like a bunch of voices all trying to talk over each other. Crystals, like people, need to be balanced with each other. Make sure the ones you are putting into a piece go together. Also, don’t feel like you need to put a ton in. Less is more if you know what you’re going for.

Some of the crystals above were not small enough to fit inside my mold, so I took a hammer and crushed them into small pieces. This may seem counter-intuitive but I felt that some pieces actually amplified their energy the smaller they were. This isn’t the case with all pieces and you’ll need to tune into the kind of energy intensity and radius you are trying to achieve when selecting sizes. Sometimes dust or sand will have frenetic or short radius energy spans while bigger chunks will have a more stable, longer range radius. Also, check with each stone you are considering breaking apart. Rocks by their very nature break apart into smaller pieces all the time but the stone you are considering may not want to be used in that way.

molds

Now, you’ll need some molds. Your mold can be whatever you want it to be, in whatever shape, in whatever material, as long as it is heat resistant. Think baking friendly. When you make orgonite, the resin curing process releases a lot of heat which will melt cheap plastics (something we learned by experience) so go along the glass, metal, silicone route. One great thing to do is scour thrift stores for their cheap ornamental glass plates, delicacy glasses, martini glasses, and that kind of thing. If you’re looking for specific shapes, like a pyramid, you’ll find sellers online that make molds for orgonite purposes.

When I started this in 2014 there weren’t that many silicone molds out there to choose from, but now there are a *ton* and they are great. Ali Express, Wish, and sites like that have cheap silicone molds in incredible shapes. You can also make your own using a product like Smooth-On silicones (more on this later).

Alright, now that we got the basic supplies out of the way, here are a few other things to keep in mind. I mentioned the safety equipment, so be sure to have a safe adequate space to do this in (preferably outside) where pets and children won’t get into your curing pieces. This is a chemical process and until the pieces are fully cured you want as little contact as possible with the resin substance itself.

Some other things you might want to consider:

I always have stirring sticks for mixing (ideally these things will be silicone and reusable but it’s okay if you use disposable ones, so long as you are NOT USING ANYTHING YOU WILL BE COOKING OR EATING WITH LATER. What you use for resin projects can only be used for resin projects). You might also want mold release on hand if you fear you will need extra help getting your finished piece out of the mold, especially if you are using glass or metal.

You’ll also need a covered table to work on. Resin is super messy and no matter how careful you are it will spill and make a mess. You won’t be able to get it off surfaces easily so make sure you have a disposable table covering or you are doing it on a surface you don’t care about. Wear clothes you don’t care about getting messy either, or put on an apron. Have lots of gloves on hand because they get sticky if you are doing multi-layer pours or multiple pieces.

I use an oversized silicone mold from Amazon that completely covers my workspace and makes clean up amazing (once the resin is cured just pick it off and wipe the mat down). But you can use parchment paper or a table cover just as easily.

It helps to set up your components beforehand to make them easy to access. You can lay out your crystal grids in your workspace so that you’ll have it ready to place when you’re at the right stage.

Alright, we’re now ready to make orgonite! We’ll be doing some actual pouring in Part 2.

Save

Save

Filed Under: Orgonite, Tutorials Tagged With: HHGs, how to make orgone, how to make orgonite, orgone, orgone devices, orgone tutorial, orgonite, resin, resin crafting, tutorial

  • « Go to Previous Page
  • Page 1
  • Page 2

Primary Sidebar

shop

shop now

Follow me on:

Products

  • Orange Blossom Astro Dice Orange Blossom Astro Dice $120.00
  • Peridot Dreams Astro Dice Peridot Dreams Astro Dice $120.00
  • Limeade Astro Dice Limeade Astro Dice $120.00
  • Bi Pride D20 Bi Pride D20 Single $12.00
  • Bi Pride Dice Bi Pride Dice $80.00

All content Copyright © 2025 Aelestrid Crafts unless noted otherwise.

-Privacy Policy -Terms And Conditions-

We use cookies to improve your experience, but you may opt out. Please see our Privacy Police for more information. Cookie settingsACCEPT
Privacy & Cookies Policy

Privacy Overview

This website uses cookies to improve your experience while you navigate through the website. Out of these cookies, the cookies that are categorized as necessary are stored on your browser as they are essential for the working of basic functionalities of the website. We also use third-party cookies that help us analyze and understand how you use this website. These cookies will be stored in your browser only with your consent. You also have the option to opt-out of these cookies. But opting out of some of these cookies may have an effect on your browsing experience.
Necessary
Always Enabled
Necessary cookies are absolutely essential for the website to function properly. This category only includes cookies that ensures basic functionalities and security features of the website. These cookies do not store any personal information.
Non-necessary
Any cookies that may not be particularly necessary for the website to function and is used specifically to collect user personal data via analytics, ads, other embedded contents are termed as non-necessary cookies. It is mandatory to procure user consent prior to running these cookies on your website.
SAVE & ACCEPT