So, I want to mention that your first pieces probably won’t turn out great. It’s a matter of trial and error in large part, and that’s okay. It’s a learning process. Resin has a learning curve to it. When I did this for the first time, I did it with a group of people, and only a few of us got decent pieces. I had done a lot of research beforehand and knew what to expect but along the way I encountered plenty of mishaps like resin curing too fast, ingredients not sitting where they should be, and so on. But here are how my first pieces turned out:
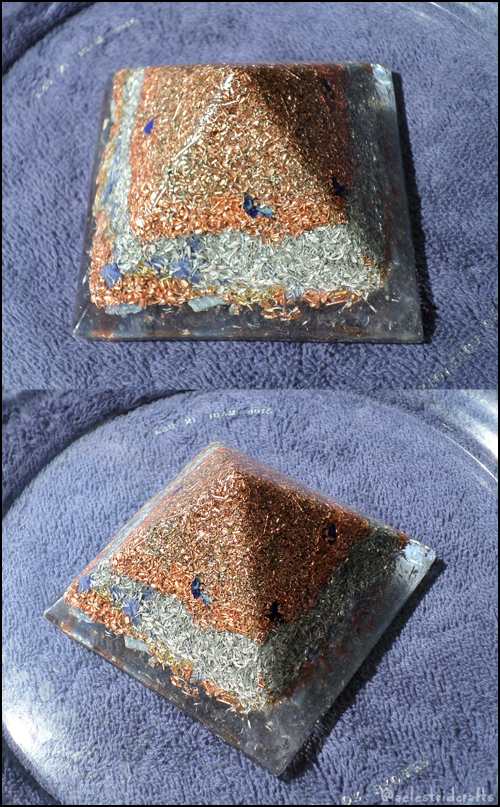

Here is my Third Eye piece. Again, it has azurite nodules, crushed sodalite, and blue kyanite blades along with a heavy dose of copper and some silver flakes. This piece was intended to be used during meditation to open my third eye. I love how you can see little pieces of azurite poking out the middle, although sadly most of them are entirely covered up by the metal.
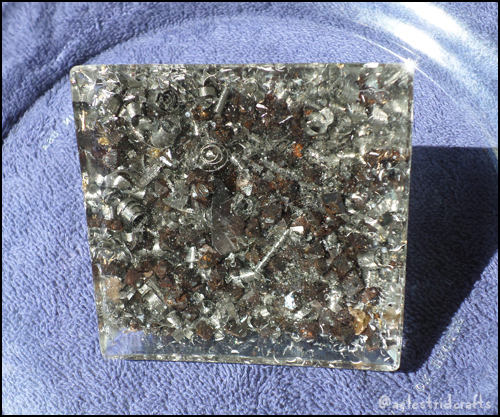
This one is my root piece. It has a hematite ring, crushed up black tourmaline, a smoky quartz point in the middle (the main quartz is at the point) and tiny hematite octahedrons which you can see intermixed with the stainless steel shavings at the bottom.
It’s fun to see that some of the metal rusted as a result of the chemical process of interacting with the resin. I consider this added value, but you may not, so do note that some metals (the hematite octahedrons in this case) may have that effect.
Now for the charging plate:


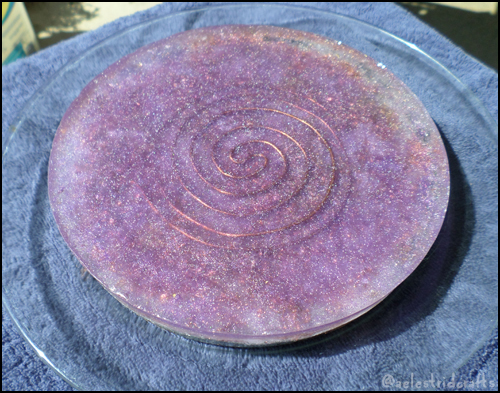
This piece came out so incredibly I couldn’t even believe it. It was extremely ambitious and unless you feel up to it I would not recommend a multi-layered complicated piece for your first pour. (I do however use this plate to charge the crystals I put into pieces now so I’m glad I did it!)
Now, all my pieces came out better than expected. It was more than I could have ever hoped for in a first pour. But that’s not to say there weren’t little things, like air bubbles and voids and mottled surfaces. At one point an entire half cup of resin had started to gel too quickly and when I tried to put it in the mold it wouldn’t spread, so I had to pull the whole glob out and mix a new half cup batch. But surprisingly it was an easy fix and didn’t mess up any of the prior layers.
When you pull yours out of the molds, that’s when you sand any rough edges (wet sand to cut down on the dust) and polish them. The results are beautiful but more importantly, functional!
Troubleshooting
So what can go wrong? A lot of things. If the resin doesn’t cure properly, it’s because you didn’t put enough hardener in, mix it correctly, or there was too much exposure to water/cold temperatures, all of which inhibit curing. If your resin cures too quickly, you either used too much hardener or the heat outside hastened the curing process. As a general rule, I don’t go by the pot time estimate of the resin (which gives fifteen or twenty minutes of working time). I get maybe five minutes of working time if it’s hot.
Be sure you are using a mold that can withstand high heat, because it’s possible you might melt your molds (or plastic mixing cups or anything else you used in the making process) with the curing heat. That’s why baking safe silicone, glass, or metal are good bets. You’ll also want that mold release to get your pieces out if you’re using a mold that can’t be bent like silicone. Putting your piece in the freezer when it’s fully cured might help it shrink just enough to remove it from a hard to remove mold.
Surface pitting, voids, and bubbles happen sometimes. They don’t affect the orgonite at all in terms of its properties, but if it bothers you visually there are things you can do. You can cast your pieces under pressure using a pressure pot that squeezes air out of the resin, or you can mix up a new batch of resin and fill in any pits. I find that polyester resin is very forgiving as far as bubbles going. (Other resins like epoxy, not so much.)
Just know that even if your first piece isn’t perfect, it’s still awesome that you made it! You’ll always cherish your first piece and hopefully enjoy it for years to come. I’m excited for you to begin this journey (or continue it) so please let me know in the comments if you have questions or want to show off your work!
Leave a Reply